Mold Removal 101: A Step-by-Step Guide for Do-It-Yourselfers
Introduction to Mold Removal
Identifying the Type of Mold and its Severity
Preparing for Mold Removal
Safety Tips when Removing Mold
Step-by-Step Guide for DIY Mold Removal
Common Mistakes People Make When Trying to Remove Mold Themselves
Aftermath: Cleaning Up and Preventing Future Mold Growth
Mold is a common problem that can affect any home or building. It’s essential to remove mold as soon as possible because it not only damages property but also poses health risks to occupants. In this guide, we will discuss how you can safely and effectively remove mold from your home yourself.
Firstly, identify the type of mold and its severity. There are several types of molds, some harmless while others highly toxic. You need to determine what kind of mold you have before proceeding with removal. If the affected area is small, you may be able to handle it on your own. However, if the mold growth covers an extensive area, consult a professional mold remediation company.
Next, prepare for mold removal by protecting yourself against exposure. Wear appropriate personal protective equipment (PPE) such as gloves, masks, goggles, and boots. Ensure that the workspace is well ventilated and secure all pets and children in another room during the process.
Now, let’s get started with the step-by-step guide for DIY mold removal:
Step 1: Remove the source of moisture – Moisture is the primary cause of mold growth. Identify the source of moisture and eliminate it. For example, fix leaky pipes, repair roof leaks, or improve ventilation in damp areas like bathrooms.

Step 2: Cut off the affected area – Use a plastic sheet to cover the contaminated area to prevent cross-contamination. Seal off the area using tape or other barriers.
Step 3: Scrub away surface mold – Using a stiff brush or cleaning solution, scrub away visible mold from hard surfaces such as walls, floors, countertops, etc. Be sure to wear PPE during this process.
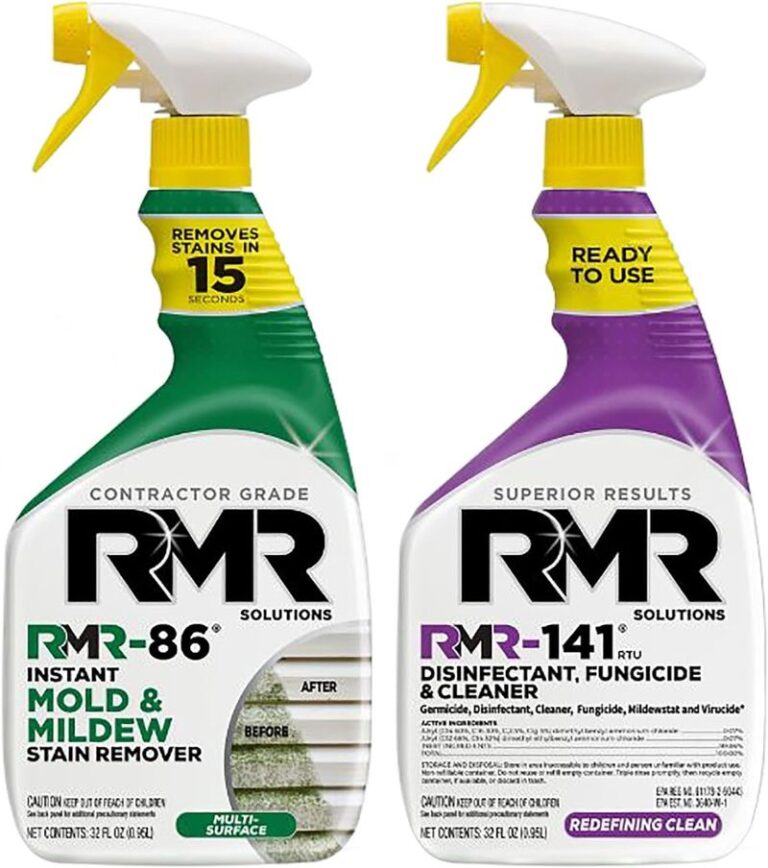
Step 4: Apply disinfectant – After removing surface mold, apply a disinfectant solution to kill remaining spores. Follow the manufacturer’s instructions carefully.
Step 5: Dry out the affected area – To prevent future mold growth, ensure that the affected area is completely dry. Open windows, use fans or dehumidifiers until there is no more evidence of moisture.
Finally, after completing these steps, thoroughly clean up the workspace and dispose of all materials used during the mold removal process. Take precautions to avoid spreading mold spores throughout the house.
In conclusion, mold removal requires careful preparation, attention to safety measures, and proper execution of the removal process. By following our step-by-step guide, you can successfully remove mold from your home without incurring significant costs associated with hiring professionals. Remember to take necessary precautions to protect yourself and your family from potential health hazards caused by mold exposure.